Saag-style chard
Ingredients: chard, clarified butter, garlic, ginger, hot peppers, salt
Note: You need a lot of chard for this recipe: for 2 adults, the uncooked and sliced chard should fill a 5-qt pot. It will cook down a lot.
Preparing: Cook finely sliced chard until it is wilted and you are able to mash it with a potato masher. Clarify your butter (heat butter, let the milk solids fall to the bottom, and cook with the "clarified" butter left on top). Add equal parts finely diced garlic, finely diced ginger, finely diced hot peppers to the clarified butter (the more you add, the more flavorful your chard... to feed 2, use at least 8 cloves of garlic). Add the mashed chard and mix.
Eating: Serve with rice or naan.
Dish history: While in Buenos Aires, we saw a story about a temple in India that serves lunch to 10,000 people a day (!) and this was the simple recipe they profiled that day. We made it on the farm all the time when we harvested an abundance of chard.
Sunday, July 24, 2011


Recipe with green beans
Green beans with ginger
Ingredients: green beans, butter, salt, ginger
Preparing: I think many people overcook green beans. Blanch the beans in boiling water for 3 minutes and then move to an ice water bath to stop the cooking. Melt butter in a saucepan, add matchstick-sized ginger slices, add salt if your butter is unsalted. Once the ginger is cooked to your liking, toss in the green beans to coat with butter and serve.
Eating: Good summer side dish. Can substitute fresh mint for ginger. Because butter is used, it really is best served warm/hot. If you wanted to make this an outdoor party side dish, I'd use a good tasting oil instead of the butter or wait for a hot day.
Dish history: We make this simple dish all the time... even made 20 pounds of it for a friend's wedding we were catering (where we, unfortunately, realized the room temperature butter version is not as appetizing).
Ingredients: green beans, butter, salt, ginger
Preparing: I think many people overcook green beans. Blanch the beans in boiling water for 3 minutes and then move to an ice water bath to stop the cooking. Melt butter in a saucepan, add matchstick-sized ginger slices, add salt if your butter is unsalted. Once the ginger is cooked to your liking, toss in the green beans to coat with butter and serve.
Eating: Good summer side dish. Can substitute fresh mint for ginger. Because butter is used, it really is best served warm/hot. If you wanted to make this an outdoor party side dish, I'd use a good tasting oil instead of the butter or wait for a hot day.
Dish history: We make this simple dish all the time... even made 20 pounds of it for a friend's wedding we were catering (where we, unfortunately, realized the room temperature butter version is not as appetizing).
Preserving: Freezing vegetables
 With our storage room all set up and the freezer running efficiently (estimated $37 worth of annual electricity usage), we are in prime freezing mode right now.
 There are many sources on freezing vegetables to refer to; we use Seymour's Self-Sufficient Gardener and The Joy of Cooking. As Seymour writes: "all fruit and vegetables should go to the freezer as soon as they are harvested. To leave them sitting about allows the sugars to start turning into starches and thereby the flavor is lost." So right from our garden harvest, we cold water rinse, blanch, flash cool and pack our vegetables. The JC gives appropriate blanching times for vegetables. Here are the ones we've tried or plan on trying this season:

Beans, green - 2.5 min
Beans, broad in pod - 4 min
Beet greens - 2.5 min
Beets, small - until tender
Broccoli - 3-4.5 min
Brussels sprouts - 3-4.5 min
Cabbage, leaf or shredded - 1.5 min
 Carrots, sliced - 3 min
Celery, diced - 3 min
Chard - 2.5 min
Chinese cabbage, shredded - 1.5 min
Collards - 2.5 min
Kale - 2.5 min
Mustard greens - 2.5 min
Parsnips - 2 min
 Peas, green - 1.5-2.5 min
Peppers - 2 min
Spinach - 2.5 min
Pumpkin, pureed - until tender
Squash, summer, sliced - 3 min
Squash, winter, pureed - until tender
Turnip greens - 2.5
Turnips, diced - 3 min
Once the vegetables have been blanched, cooled and packed, we use Seymour's tip of sucking out the air using a drinking straw (rather than buying a vacuum sealer). Yesterday, although the hottest day on record in our area, we harvested our collards after we noticed some pest damage and ended up with 40 packed cups worth. We even saved the stems and may try pickling them.
Who doesn't think frozen veggies are far superior to canned?
Saturday, July 23, 2011
Recipe with borage
Borage cocktail
Ingredients: borage leaves, vodka or gin, club soda or tonic (optional), borage flowers
Preparing: Rip up some borage leaves into a cocktail shaker (or muddle them for more flavor). Add the alcohol of your choice and shake.
Drinking: Strain the cocktail straight for a borage-tini and garnish with borage flowers and a thin lemon round. Or mix with club soda or tonic for a refreshing mixed drink.
Drink history: We read in our Seymour book that borage leaves have a "cooling effect" in drinks. With our master-drink-maker friend visiting, we decided to give them a try in our cocktails. If muddled, they produce a very green drink; just shaking in a shaker with ice might still produce the same taste effect, but the drink will be a milder color. The smell and taste are both very cucumber-like. You could also try to use them while making a simple syrup or leave them in alcohol or tea or water to steep for a few days.
Ingredients: borage leaves, vodka or gin, club soda or tonic (optional), borage flowers
 |
| Borage plant |
Drinking: Strain the cocktail straight for a borage-tini and garnish with borage flowers and a thin lemon round. Or mix with club soda or tonic for a refreshing mixed drink.
Drink history: We read in our Seymour book that borage leaves have a "cooling effect" in drinks. With our master-drink-maker friend visiting, we decided to give them a try in our cocktails. If muddled, they produce a very green drink; just shaking in a shaker with ice might still produce the same taste effect, but the drink will be a milder color. The smell and taste are both very cucumber-like. You could also try to use them while making a simple syrup or leave them in alcohol or tea or water to steep for a few days.
Holy tomato
We harvested our first Cherokee purple heirloom tomato. She was growing in a 3-pronged manner, quite strangely. But she sure did taste good with just a few flecks of salt.


Thursday, July 21, 2011
Deposito
Every aspiring self-sufficient household needs to have a lot of space for food storage. As we harvest right now, we are freezing, pickling and canning for the winter months and spring food gap.
And now, thanks to the sharp carpentry skills of our friend (also our parrilla-builder) we have built-in storage shelves in our deposito. We foraged the old stables and wood piles around the property for forgotten wood and managed to build the 9-ft long by 9-ft high, floor-to-ceiling, fully-notched shelves without any home-cheapo-bought pressure-treated 2x4s. It is gorgeous and fits with with the style of the old tack room we've chosen for our food storage space. We fixed a rotting baseboard and animal-proofed it. The saddle shelves are still there and we'll use them to hang onions, garlic and squash. The feed holder is still there and we'll use it to store potatoes, beets and celeriac. And we've added a 15-cu.ft. chest freezer to sit below the window on the open wall. The finishing touches will be to insulate the windows once the winter freezes settle in.
It may take years to get to the point where we're filling the deposito to capacity... what a satisfying time that will be.

And now, thanks to the sharp carpentry skills of our friend (also our parrilla-builder) we have built-in storage shelves in our deposito. We foraged the old stables and wood piles around the property for forgotten wood and managed to build the 9-ft long by 9-ft high, floor-to-ceiling, fully-notched shelves without any home-cheapo-bought pressure-treated 2x4s. It is gorgeous and fits with with the style of the old tack room we've chosen for our food storage space. We fixed a rotting baseboard and animal-proofed it. The saddle shelves are still there and we'll use them to hang onions, garlic and squash. The feed holder is still there and we'll use it to store potatoes, beets and celeriac. And we've added a 15-cu.ft. chest freezer to sit below the window on the open wall. The finishing touches will be to insulate the windows once the winter freezes settle in.
It may take years to get to the point where we're filling the deposito to capacity... what a satisfying time that will be.
 |
| Rotten baseboard out |
 |
| New baseboard in |
 |
| Building the shelves |
 |
| Finished shelving |

Wednesday, July 20, 2011
Holy oven
With all of the canning and preserving we see in our future, and temperatures in the 90s these peak harvest times, the thought of heating the kitchen up with pots of boiling water is quite unappealing. So we are thanking our lucky stars that a restaurant-grade 6-burner dual oven has landed in our garage.
 A friend of ours was clearing out his storage space in Brooklyn the day before he was moving to Texas. We drove down, with our trailer hitched on, to meet him. In addition to some great catering gear, he offered us this amazing oven after the deal he had set up fell through.
So we loaded up the 900-lb beast, strapped her on, and took off down bumpy Atlantic Avenue. Five stops, a broken ratchet, a moving griddle pan, a breaking back leg and 4 hours later, we pulled into Longhaul.
Jason cleaned her spic-n-span and now we need to hook her up to our propane and rearrange the garage. And blanching our veggies and canning our preserves will be so much more pleasant now, especially with temperatures reaching 99 at the end of the week. Our next project: setting up the food storage room.

So we loaded up the 900-lb beast, strapped her on, and took off down bumpy Atlantic Avenue. Five stops, a broken ratchet, a moving griddle pan, a breaking back leg and 4 hours later, we pulled into Longhaul.
Jason cleaned her spic-n-span and now we need to hook her up to our propane and rearrange the garage. And blanching our veggies and canning our preserves will be so much more pleasant now, especially with temperatures reaching 99 at the end of the week. Our next project: setting up the food storage room.
Saturday, July 16, 2011
Blueberry harvest
With our seven blueberry bushes no more than a foot high and barren, we've harvested blueberries from three different sources recently.

 The first was a local farm which sprays their fruit but has a very cheap price per pound. It was a really pleasant experience. The berries are just becoming ripe, so I felt good about my picking, knowing it would spur on the other green ones on the cluster to ripen. The highbush varieties were at least 6 feet tall, and the rows between them were pleasantly wide and grassy. The berries were much smaller than the ones you buy in the grocery store, as expected.
Then we drove south to another local farm that produces organic fruit. At $6 per pound, I was happy I filled up at the cheaper farm. I didn't notice a difference in the berries or their bushes between the organic and non-organic farm. What I did notice is that the organic farm was weedier and not as pleasant to walk through, especially because there was poison ivy EVerywhere. Our friend's almost-2-year-old dumped her bucket of blueberries in the path and her mom started picking them up until I, with my poison-ivy-eye, told her to stand back and stop what she was doing. Oy.
And finally, we hit our dream spot: a wild blueberry grove tucked away behind a beautiful field of grasses and wild flowers in some nearby publicly-owned land. These highbushes were 7-9 feet tall, also in the early stages of ripeness, but gorgeous. The paths between them were overgrown with yarrow and cattails and virginia creeper, the breeze blowing through them ever so gently. There were also wild grapes using the highbush blueberries as natural trellises, green and hard and far from ripe. It was so peaceful to pick in silence with the birds.
So now we have a freezer-ful of blueberries, many pints of blueberry jam and some blueberry cakes and muffins coming soon.

 The first was a local farm which sprays their fruit but has a very cheap price per pound. It was a really pleasant experience. The berries are just becoming ripe, so I felt good about my picking, knowing it would spur on the other green ones on the cluster to ripen. The highbush varieties were at least 6 feet tall, and the rows between them were pleasantly wide and grassy. The berries were much smaller than the ones you buy in the grocery store, as expected.
Then we drove south to another local farm that produces organic fruit. At $6 per pound, I was happy I filled
 up at the cheaper farm. I didn't notice a difference in the berries or their bushes between the organic and non-organic farm. What I did notice is that the organic farm was weedier and not as pleasant to walk through, especially because there was poison ivy EVerywhere. Our friend's almost-2-year-old dumped her bucket of blueberries in the path and her mom started picking them up until I, with my poison-ivy-eye, told her to stand back and stop what she was doing. Oy.
And finally, we hit our dream spot: a wild blueberry grove tucked away behind a beautiful field of grasses and wild flowers in some nearby publicly-owned land. These highbushes were 7-9 feet tall, also in the early stages of ripeness, but gorgeous. The paths between them were overgrown with yarrow and cattails and virginia creeper, the breeze blowing through them ever so gently. There were also wild grapes using the highbush blueberries as natural trellises, green and hard and far from ripe. It was so peaceful to pick in silence with the birds.
So now we have a freezer-ful of blueberries, many pints of blueberry jam and some blueberry cakes and muffins coming soon.
Tuesday, July 12, 2011
Recipe with black currant
Black currant and bacon pizza
Ingredients: pizza dough, sauce, cheese, blackcurrants, bacon, maple syrup, arugula
Preparing: Top your basic pizza with fresh blackcurrants, crispy bacon and arugula (or spinach) and drizzle a bit of maple syrup on it. We used mozzarella, but I bet ricotta or feta would be great, too.
Eating: As is.
Dish history: We had a few handfuls of leftover blackcurrants after having made jams and tarts for the past few days and figured we'd give it a try. The flavors work well together, plus, bacon makes everything better.
Ingredients: pizza dough, sauce, cheese, blackcurrants, bacon, maple syrup, arugula
Preparing: Top your basic pizza with fresh blackcurrants, crispy bacon and arugula (or spinach) and drizzle a bit of maple syrup on it. We used mozzarella, but I bet ricotta or feta would be great, too.
Eating: As is.
Dish history: We had a few handfuls of leftover blackcurrants after having made jams and tarts for the past few days and figured we'd give it a try. The flavors work well together, plus, bacon makes everything better.
Thursday, July 7, 2011
Got cigarette butts?
Something productive has come out of the business of tobacco cultivation: an organic insecticide.
According to our gardening guru, John Seymour, nicotine spray is one of the most powerful organic sprays out there for getting rid of insects. Get a smoker you love to save their butts for you, boil 4 ounces of butts to 1.2 gallons of water, strain and dilute to a 1:2 solution of nicotine:water. Spray this solution on plant foliage and stems (and even fruits since it degrades so quickly, but we're not comfortable doing that yet) and you'll witness the insects dropping like flies... not dead, but knocked out and not wanting to get back onto the plant. The main caution of such an insecticide is that it gets rid of both pests and beneficial insects. Therefore, Seymour recommends using it only if the manual picking-and-crushing-between-your-fingers-method is getting out of control...
... as it was with our curcurbits (cucumber, melon, squash, zucchini). The black and yellow-striped cucumber beetles were shamelessly mating on the leaves, even in some of the blossoms.
Nicotine spray is considered a natural insecticide because it is derived from a plant (others include pyrethrum and neem, for example). Nicotine is found in the nightshade family of plants (solanaceae), predominantly in tobacco, and in lower quantities in tomato, potato, eggplant and pepper. Nicotine-based sprays appear to be in the process of being banned as insecticides in the U.S. (if only it could be banned as a cancer-and-disease-causing stick as well) because of its potential link to bee susceptibility to disease, which has now made me think twice about using it again. Back to the old manual removal method.
 |
| Spraying our cukes |
... as it was with our curcurbits (cucumber, melon, squash, zucchini). The black and yellow-striped cucumber beetles were shamelessly mating on the leaves, even in some of the blossoms.
Nicotine spray is considered a natural insecticide because it is derived from a plant (others include pyrethrum and neem, for example). Nicotine is found in the nightshade family of plants (solanaceae), predominantly in tobacco, and in lower quantities in tomato, potato, eggplant and pepper. Nicotine-based sprays appear to be in the process of being banned as insecticides in the U.S. (if only it could be banned as a cancer-and-disease-causing stick as well) because of its potential link to bee susceptibility to disease, which has now made me think twice about using it again. Back to the old manual removal method.
Tuesday, July 5, 2011
Preserving: Black currant jam
A big part of our longhaul way of life is to try to eat from the food we grow year-round. This means preserving fruit when it's at its peak so it can be enjoyed throughout the year. Since our fruit garden is in its infancy, we decided that picking local fruit and preserving it is the best and only way to get vitamin C and other antioxidants during the winter and early spring.
 In the Hudson Valley right now black currants are ripe and ready. Some strawberries are, too, and this week we should have blueberries (but our early June cherry crop didn't come this year due to lots of rain and cloudy days). So I went to a local pick-your-own farm and harvested 5 pounds of currants in about an hour. After the first 15 minutes of picking, I remembered that it's hard and tedious work. Each currant bush had dozens of branches with hundreds of berries on them. Not all of them are ripe at the same time, so you have to pick your way through. And since I was planning on making jam right away, I painstakingly made sure there was nothing in that bucket but berries.

We preserved a lot of dulces (jams) and fruit down in Argentina, so I just followed the same method up here:
 (1) Wash and sterilize your jars. (Wash jars with warm soapy water, then rinse them in water with a bit of bleach to sterilize them. Then rinse again in clean water. Wash tops with warm soapy water and then sterilize in boiling water. Let jars and tops air dry - don't dry with a towel, etc.)
(2) Use a large pot - big enough so that the fruit and sugar only fill it halfway (the jam rises as you cook it). Add your fruit and sugar in a 5:4 ratio. Since I had 5 pounds of black currants, I added 4 pounds of sugar. (This ratio preserves the jam sufficiently to store jars of it at room temperature for four years.)
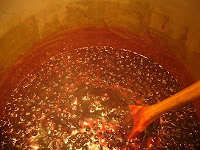
 (3) Cook the fruit and sugar over high heat, boiling and stirring constantly. You can add a bit of butter to prevent foaming. Cook time can take anywhere from 30 minutes to an hour, depending on the amount you're cooking and the type of fruit. (Black currants are naturally high in pectin, so they take a shorter amount of time. Strawberries, on the other hand, are low in pectin so take longer to reach the right consistency.)
(4) Test for the right consistency by spooning a small amount on a cold, clean plate. Once it cools, tip the plate to see if it runs: when it runs ever so slightly, cook for 1-2 minutes more.
(5) Pour the hot jam directly into your sterilized jars and close immediately. Be sure to use gloves and keep the jar in a metal pot while pouring in case it shatters.

 In the Hudson Valley right now black currants are ripe and ready. Some strawberries are, too, and this week we should have blueberries (but our early June cherry crop didn't come this year due to lots of rain and cloudy days). So I went to a local pick-your-own farm and harvested 5 pounds of currants in about an hour. After the first 15 minutes of picking, I remembered that it's hard and tedious work. Each currant bush had dozens of branches with hundreds of berries on them. Not all of them are ripe at the same time, so you have to pick your way through. And since I was planning on making jam right away, I painstakingly made sure there was nothing in that bucket but berries.

We preserved a lot of dulces (jams) and fruit down in Argentina, so I just followed the same method up here:
 (1) Wash and sterilize your jars. (Wash jars with warm soapy water, then rinse them in water with a bit of bleach to sterilize them. Then rinse again in clean water. Wash tops with warm soapy water and then sterilize in boiling water. Let jars and tops air dry - don't dry with a towel, etc.)
(2) Use a large pot - big enough so that the fruit and sugar only fill it halfway (the jam rises as you cook it). Add your fruit and sugar in a 5:4 ratio. Since I had 5 pounds of black currants, I added 4 pounds of sugar. (This ratio preserves the jam sufficiently to store jars of it at room temperature for four years.)

 (3) Cook the fruit and sugar over high heat, boiling and stirring constantly. You can add a bit of butter to prevent foaming. Cook time can take anywhere from 30 minutes to an hour, depending on the amount you're cooking and the type of fruit. (Black currants are naturally high in pectin, so they take a shorter amount of time. Strawberries, on the other hand, are low in pectin so take longer to reach the right consistency.)
(4) Test for the right consistency by spooning a small amount on a cold, clean plate. Once it cools, tip the plate to see if it runs: when it runs ever so slightly, cook for 1-2 minutes more.
(5) Pour the hot jam directly into your sterilized jars and close immediately. Be sure to use gloves and keep the jar in a metal pot while pouring in case it shatters.

Saturday, July 2, 2011
Small doses
I am happy to say that I have been poison ivy free for one month now.
I haven't been avoiding it, as I probably should during these summer months when the oils appear to be dripping off of the leaves. In fact, I've taken a fork to many a plant to remove them from our garden area, which involves picking up the leaves and vines with gloved hands and disposing of them.
I would like to attribute my string of good luck to Oral Ivy, a homeopathic product that builds up your body's natural defenses against the toxic oils of poison ivy, oak and sumac. I take 3 drops of the concentrated rhus toxicodendron a day.
 Like any homeopathic product, Oral Ivy works in small doses. Such remedies are made by potentizing a substance (serially diluting in water or alcohol, for example, and vigorously shaking it). The substance to be potentized is usually similar to the ailment one is trying to prevent (e.g., potentize poison ivy oil to prevent poison ivy; potentize pollen to prevent pollen allergies), but others are less intuitive. It is a complex science, despite the fact that it is not recognized by strict scientists nor the FDA as a viable "medicine."
I've always believed that small is beautiful (in the economic sense, and also in the social and cultural ones). There is a rhyme and reason to the practice of homeopathic remedies, just as there is one to the concept of peppering in biodynamic farming. In a time and space where bigness, globalism, heavy consumption, needless accumulation and frivolous expansion dominate the collective consciousness, recognizing and participating in the smallness of things is the best remedy I can think of.
I haven't been avoiding it, as I probably should during these summer months when the oils appear to be dripping off of the leaves. In fact, I've taken a fork to many a plant to remove them from our garden area, which involves picking up the leaves and vines with gloved hands and disposing of them.
I would like to attribute my string of good luck to Oral Ivy, a homeopathic product that builds up your body's natural defenses against the toxic oils of poison ivy, oak and sumac. I take 3 drops of the concentrated rhus toxicodendron a day.

I've always believed that small is beautiful (in the economic sense, and also in the social and cultural ones). There is a rhyme and reason to the practice of homeopathic remedies, just as there is one to the concept of peppering in biodynamic farming. In a time and space where bigness, globalism, heavy consumption, needless accumulation and frivolous expansion dominate the collective consciousness, recognizing and participating in the smallness of things is the best remedy I can think of.
Thursday, June 30, 2011
R.I.P., Groundhogs
So you might be aware of our pest problem, and the fact that we have no more cilantro, broccoli, cauliflower or red cabbage plants growing in our garden. They even got to some kale, beet greens and radish tops.
Now we are less two groundhogs who were wreaking havoc on our vegetables. Without any detail, we actively got rid of one and passively got rid of another. But the big, fat, lumbering momma is still out there, although hopefully has moved her home since her presumed two offspring are gone.
It is a lot stranger to get rid of a 7-pound rodent than to squish a beetle between your fingers. We have not yet used a .22 (but are well-trained now, thanks to a very professional lesson from my father), but I can only imagine that killing an animal with one would be too easy (as long as you're a good shot)... you're physically removed from the being, pulling a trigger isn't innately violent and we've all seen it done millions of times in movies.
If only Mrs. Groundhog and her family had been feeding on the acres of grasses around us rather than our 2000-sq-ft vegetable beds, we could have all lived together.
Now we are less two groundhogs who were wreaking havoc on our vegetables. Without any detail, we actively got rid of one and passively got rid of another. But the big, fat, lumbering momma is still out there, although hopefully has moved her home since her presumed two offspring are gone.
It is a lot stranger to get rid of a 7-pound rodent than to squish a beetle between your fingers. We have not yet used a .22 (but are well-trained now, thanks to a very professional lesson from my father), but I can only imagine that killing an animal with one would be too easy (as long as you're a good shot)... you're physically removed from the being, pulling a trigger isn't innately violent and we've all seen it done millions of times in movies.
If only Mrs. Groundhog and her family had been feeding on the acres of grasses around us rather than our 2000-sq-ft vegetable beds, we could have all lived together.
Wednesday, June 29, 2011
Recipe with arugula
Arugula and prosciutto pizza
Ingredients: pizza dough, tomato sauce, cheese, prosciutto, arugula, lemon
Preparing: Make your pizza dough. Roll out dough and top with sauce, a bit of cheese, red hot pepper flakes and oregano (if desired), prosciutto, more cheese. Pop in oven at 500F for 10-ish minutes. When nearly done, completely cover pizza with fresh arugula and bake for 1 more minute.
Eating: Splash fresh lemon juice on your slice.
Dish history: This also originated for us in Argentina. Pizza Fridays were never the same once our butcher let us taste his home-salted prosciutto and we were able to cut fresh arugula from the garden.
Ingredients: pizza dough, tomato sauce, cheese, prosciutto, arugula, lemon
Preparing: Make your pizza dough. Roll out dough and top with sauce, a bit of cheese, red hot pepper flakes and oregano (if desired), prosciutto, more cheese. Pop in oven at 500F for 10-ish minutes. When nearly done, completely cover pizza with fresh arugula and bake for 1 more minute.
Eating: Splash fresh lemon juice on your slice.
Dish history: This also originated for us in Argentina. Pizza Fridays were never the same once our butcher let us taste his home-salted prosciutto and we were able to cut fresh arugula from the garden.
Tuesday, June 28, 2011
Experimenting
Now that we've reached our goal of 20 double-dug beds, we are experimenting with other ways to loosen and add fertility to our soil.
First, we're trying a no-dig method:
Place sheets of newspaper or cardboard directly on the grass/sod. Add organic material in layers, alternating browns and greens (we're adding leftover sod from other beds, leaves, grass clippings, coffee grounds, 2-year old wood chips and soil from our leaf pile that has been decomposing for years) until you've built a "raised bed." Hopefully by mid-July we'll have built up enough material so we can plant a tap-rooting cover crop in there to break up the soil even more. This method is also referred to as the "lasagna" method due to the layering of materials. I honestly don't have highest hopes for this method, since I already know there are a few large rocks just below the surface and hundreds of smaller ones, and organic decomposition doesn't help us with that. But we are assuming that by next spring we'll be able to stick our forks into loosened, highly fertile soil.
Next, we're trying single-digging:
Remove the sod. Use a pick-axe to loosen the soil, remove all of the rocks and weed debris, continue to fork and pick-axe the loosened soil until the fork goes in 12 inches. So we are saving ourselves the steps of moving the top 12 inches of soil and loosening the next 12 inches of subsoil, cutting our bed-digging time in half. I have higher hopes for this one since we are getting a lot of rocks out. We will add manure and other organic material to the loosened soil, mulch it heavily and plant a green manure crop. We're hoping the winter freezes will have heaved a few more rocks upwards into the loosened soil so we can remove them in early spring and plant some vegetable crops there.
Finally, we may experiment with some long-row, tractor-tilled space:
If a friend of ours can come in to till some 100-foot rows for us, we'll do the work of removing rocks and planting the green manure. These long rows could be a great space for main crop potatoes, carrots, corn or blueberry bushes.
In any case, all new beds will be receiving full soil fertility treatment: no more vegetable sowing, just adding organic material, cover crops, and liming in the fall when we till in the green manure.
First, we're trying a no-dig method:
Place sheets of newspaper or cardboard directly on the grass/sod. Add organic material in layers, alternating browns and greens (we're adding leftover sod from other beds, leaves, grass clippings, coffee grounds, 2-year old wood chips and soil from our leaf pile that has been decomposing for years) until you've built a "raised bed." Hopefully by mid-July we'll have built up enough material so we can plant a tap-rooting cover crop in there to break up the soil even more. This method is also referred to as the "lasagna" method due to the layering of materials. I honestly don't have highest hopes for this method, since I already know there are a few large rocks just below the surface and hundreds of smaller ones, and organic decomposition doesn't help us with that. But we are assuming that by next spring we'll be able to stick our forks into loosened, highly fertile soil.
Next, we're trying single-digging:
Remove the sod. Use a pick-axe to loosen the soil, remove all of the rocks and weed debris, continue to fork and pick-axe the loosened soil until the fork goes in 12 inches. So we are saving ourselves the steps of moving the top 12 inches of soil and loosening the next 12 inches of subsoil, cutting our bed-digging time in half. I have higher hopes for this one since we are getting a lot of rocks out. We will add manure and other organic material to the loosened soil, mulch it heavily and plant a green manure crop. We're hoping the winter freezes will have heaved a few more rocks upwards into the loosened soil so we can remove them in early spring and plant some vegetable crops there.
Finally, we may experiment with some long-row, tractor-tilled space:
If a friend of ours can come in to till some 100-foot rows for us, we'll do the work of removing rocks and planting the green manure. These long rows could be a great space for main crop potatoes, carrots, corn or blueberry bushes.
In any case, all new beds will be receiving full soil fertility treatment: no more vegetable sowing, just adding organic material, cover crops, and liming in the fall when we till in the green manure.
Saturday, June 25, 2011
Treated seeds
We've decided that once we pull an early crop (e.g., spinach, arugula) out of the ground, we should replant with peas while it's still early in the season. That way we supply some nitrogen to the soil (since peas are legumes) and get a vegetable to harvest in the fall. Much to my dismay, I opened up my 5-lb bag of shelling peas to find I had accidentally ordered treated peas. (The seed company we were dealing with was great and agreed to take back the bag and credit my account.)
Treated seeds are treated with a fungicidal powder (typically Thiram or Captan) as a preventative against damping off diseases and seeds rotting in cold damp soil. The chemicals used to treat seeds can be harmful to human health, and although they are designed to have short half-lives and cling to soil particles so they erode and pollute less, they are also harmful to the environment. Many corn, bean, peas, lettuce and melon seeds, among others, are available treated.
Treated seeds were developed primarily so large scale growers could benefit from an early yield: treated seeds planted in cold damp soil in early spring are less likely to rot. This increases the germination rate and future yield. But if profit's not your motive, you can just wait until the time is right, when the soil's warmed appropriately for whatever seed variety you are putting into the ground, and you don't have to worry about rotting seeds. With increasing population, high-demand global markets and rising food prices, how could we ever wean ourselves from big ag's use of treated seeds?
As a small-scale grower or home gardener, we have the choice to buy treated, untreated conventional or organic seeds. When you buy seeds online you can be sure to check the box that says "will NOT accept treated seeds" if you plan on growing organically and you will never be shipped a treated product. But another way to avoid treated seeds is to save your own and maybe eve join a seed saver exchange. That way you and your fellow exchange members control both the seed and the growing conditions, ensuring a safer, more locally-appropriate crop.
 |
| The red peas (L) are treated. |
Treated seeds were developed primarily so large scale growers could benefit from an early yield: treated seeds planted in cold damp soil in early spring are less likely to rot. This increases the germination rate and future yield. But if profit's not your motive, you can just wait until the time is right, when the soil's warmed appropriately for whatever seed variety you are putting into the ground, and you don't have to worry about rotting seeds. With increasing population, high-demand global markets and rising food prices, how could we ever wean ourselves from big ag's use of treated seeds?
As a small-scale grower or home gardener, we have the choice to buy treated, untreated conventional or organic seeds. When you buy seeds online you can be sure to check the box that says "will NOT accept treated seeds" if you plan on growing organically and you will never be shipped a treated product. But another way to avoid treated seeds is to save your own and maybe eve join a seed saver exchange. That way you and your fellow exchange members control both the seed and the growing conditions, ensuring a safer, more locally-appropriate crop.
Friday, June 24, 2011
Recipe with kale
Kale chips
Ingredients: kale, olive oil, salt, pepper, red hot pepper flakes
 Preparing: Wash kale and cut out tough stems. Toss with olive oil, salt, pepper and red hot pepper flakes. Grill for 10 minutes (or place under broiler) - until the edges of the leaves have crisped up nicely.
Eating: Eat with your fingers as a tasty appetizer or side dish to other grilled foods.
Dish history: We became obsessed with these "kale chips" in Argentina: there was an abundance of kale in the garden and we loved our parrilla. Simple.
Ingredients: kale, olive oil, salt, pepper, red hot pepper flakes

Eating: Eat with your fingers as a tasty appetizer or side dish to other grilled foods.
Dish history: We became obsessed with these "kale chips" in Argentina: there was an abundance of kale in the garden and we loved our parrilla. Simple.
Tuesday, June 21, 2011
The perils of public health: the case of raw milk
I'm sure many of us have tasted raw milk... years ago as small children or, more recently, fresh from a cow on a farm. Isn't it so much creamier and tastier? Don't you feel healthier after a glass?
Raw milk is milk that has not been pasteurized or homogenized. Following the Industrial Revolution, the
swarms of people leaving behind their cows and rural homes for urban life, the discovery of the pasteurization process, and the up-scaling of dairy production on huge industrial farms, raw milk has been harder and harder to find. For all the good the field of public health brings us, it has brought us peril in the case of milk. The turn of the twentieth century saw the spread and dominance of the germ theory, the belief that disease was spread through microorganisms, such as bacteria.* Public health professionals, of course, were correct: many diseases are indeed spread through "germs." However, where we went wrong as a profession was our unfiltered, widespread push for pasteurization. In effect, all farmer's milk is treated as potentially contagious. This gives us peace of mind in an era of not being able to connect our milk bottle to a farmer's or cow's face. But is has also created a culture that assumes all unpasteurized products are dangerous.
These days selling raw milk is illegal in over 20 states. But there is a movement afoot to bring it back into trade, albeit at the small scale. It is sometimes available at farmer's markets, as part of CSA shares or for pick-up on farms. Raw milk proponents believe their unpasteurized version has more nutritive value and health-promoting bacteria than their mass-produced, highly-heated, bland-tasting counterpart. Its producers say that as long as their practices are sanitary (which can be more easily controlled when it is a small operation, for example), their milk is healthy for you. And its fans say it just tastes better.
Too bad I live in New York State, where the sale of raw milk at farmer's markets is illegal. (Luckily, we got one delicious week's installment before the farmer was told to halt sales.)
* Admittedly, a much better theory than the previous generation of public health professionals held onto: the miasma theory, the belief that miasma, a rotten, toxic form of air, caused disease and death.
Raw milk is milk that has not been pasteurized or homogenized. Following the Industrial Revolution, the
 |
| Our nearly gone half-gal of raw milk. |
These days selling raw milk is illegal in over 20 states. But there is a movement afoot to bring it back into trade, albeit at the small scale. It is sometimes available at farmer's markets, as part of CSA shares or for pick-up on farms. Raw milk proponents believe their unpasteurized version has more nutritive value and health-promoting bacteria than their mass-produced, highly-heated, bland-tasting counterpart. Its producers say that as long as their practices are sanitary (which can be more easily controlled when it is a small operation, for example), their milk is healthy for you. And its fans say it just tastes better.
Too bad I live in New York State, where the sale of raw milk at farmer's markets is illegal. (Luckily, we got one delicious week's installment before the farmer was told to halt sales.)
* Admittedly, a much better theory than the previous generation of public health professionals held onto: the miasma theory, the belief that miasma, a rotten, toxic form of air, caused disease and death.
Recipe with basil
Basil pesto (I'm doing such a basic basil recipe because it's a cheaper and easier one)

Ingredients: basil, pepitas (de-hulled pumpkin or squash seeds), parmesan cheese, garlic, olive oil, lemon juice
Preparing: If you have full/tall stems of basil, remove the stem from below the bottom set of leaves and keep the rest of the stems and leaves (you don't even have to chop them). Combine in a food processor the basil (leaves and adjoining stems), parmesan, pepitas (cheapter than pine nuts) and garlic. Slowly add the olive oil (or vegetable oil, even cheaper). When you get the right consistency, squeeze in some fresh lemon juice. Store in a jar in the refrigerator.
(Note: 8 cups of very loosely packed basil made 2 cups of pesto)
Eating: Really tasty on toasted raisin bread.
Dish history: Down in Argentina we made pesto all of the time, which is where we learned the stem-and-all trick, vegetable oil trick and non-pine-nut trick (we used walnuts that we harvested from the farm).
Saturday, June 18, 2011
Peppering
Pests are a part of our ecology, and for this reason, I respect them. But when they do damage to my livelihood, I don't feel so bad about taking measures to get rid of them.
 A farmer battles with many forms of pests: animals, insects, bacteria, fungi, viruses and weeds. Each battle depends on the pest at hand. And some battles can take over your life... this is, presumably, why insecticides, agricultural antibiotics and herbicides were invented and are now overused. But as an organic producer, we won't use synthetic or chemical products to protect our plants.
Instead, we use row covers, our fingers, predator urine, companion planting, beneficial insects, we make sure our soil's healthy, and some use organic sprays. And after a recent visit to a biodynamic farm, the Pfeiffer Center, I was introduced to the concept of "peppering."
You can read about this art in Rudolf Steiner's own words to understand the meaning behind the method. I'll explain briefly in the case of peppering to prevent weeds: When a weed goes to seed, collect the seeds, place them in a metal container and burn them in a hot fire. Collect the ashes from these seeds, mix them with the wood ash from the fire, and sprinkle this ash around your garden where you do not want these weeds to grow. With the case of insects you would burn the whole insect and with the case of animals you would burn the hide. You can repeat this process several times a year and you can follow Steiner's word on the appropriate times to do it (based on the moon and other cosmic forces). After three to four years, you should be virtually pest-free.
There is a lot to remark on this method. For one, if you kill the groundhog eating your broccoli and you do this in successive years, you'll have exterminated the problem and maybe the burning/sprinkling didn't do anything. Also, if it takes three to four years, what should I do in the meantime to protect my plants?!? But if you do read Steiner's lecture and study biodynamic farming, you might be led to believe in the power of peppering.

Instead, we use row covers, our fingers, predator urine, companion planting, beneficial insects, we make sure our soil's healthy, and some use organic sprays. And after a recent visit to a biodynamic farm, the Pfeiffer Center, I was introduced to the concept of "peppering."
You can read about this art in Rudolf Steiner's own words to understand the meaning behind the method. I'll explain briefly in the case of peppering to prevent weeds: When a weed goes to seed, collect the seeds, place them in a metal container and burn them in a hot fire. Collect the ashes from these seeds, mix them with the wood ash from the fire, and sprinkle this ash around your garden where you do not want these weeds to grow. With the case of insects you would burn the whole insect and with the case of animals you would burn the hide. You can repeat this process several times a year and you can follow Steiner's word on the appropriate times to do it (based on the moon and other cosmic forces). After three to four years, you should be virtually pest-free.
There is a lot to remark on this method. For one, if you kill the groundhog eating your broccoli and you do this in successive years, you'll have exterminated the problem and maybe the burning/sprinkling didn't do anything. Also, if it takes three to four years, what should I do in the meantime to protect my plants?!? But if you do read Steiner's lecture and study biodynamic farming, you might be led to believe in the power of peppering.
Subscribe to:
Posts (Atom)