Saturday, July 30, 2011

Preserving: Pickling cucumbers, beans and zucchini

Pickling is a method for preserving vegetables by canning. Only acidic fruits and vegetables (e.g., tomatoes) can be safely canned with the boiling-water bath method. Other non-acidic fruits and vegetables need to be acidified for safe home-canning (plus, frozen vegetables just taste better).

So our half-bushel of cucumbers and abundant green beans and zucchini got the pickling treatment. Adding a vinegar-water-salt (and sometimes sugar) solution to sterilized jars with spices and vegetables and then processing the jars in boiling water for a minimum of 10 minutes ensures safe vegetables through the winter months and spring food gap. Here's our process:

(1) Wash vegetables and cut to size so they fit into your sterilized jars with some room to spare at the top (it's important that all parts of the vegetable come into contact with the pickling solution). Seed cucumbers if you prefer.
(2) Bring to boil equal portions water and vinegar with 1/4 cup salt for every 5 cups of liquid.
(3) Pack sterilized jars with a garlic clove, 1/2 jalapeno, a few coriander seeds, a few peppercorns, a hefty pinch of mustard seeds and dill flowers. Pack in vegetables.
(4) Pour boiling pickling solution into jars, leaving about 1/2 inch of space at the top. Be sure all vegetables are covered with the solution. Seal tightly.
(5) Process in boiling water bath for at least 10 minutes (we processed the cucumber pickles for 20 minutes, as suggested by The Joy of Cooking).
(6) Leave jars to pickle for at least 1 week before opening. Store at room temperature.

Recipe with summer squash

Stuffed squash

Waiting for the gratin topping
Ingredients: large zucchini or other summer squash, onion, garlic, 1 egg, bread crumbs, parmesan cheese

Preparing: Slice squash lengthwise and scoop out pulp. Saute diced onion and garlic. Add chopped up squash pulp. Add fresh herb of your choosing or boil off some white wine, or include any other extra vegetable bits at this saute stage. Take mixture off the heat and add beaten egg, bread crumbs (about a cup, but depends on size of squash) and a good helping of grated parmesan cheese. Oil the insides of the squash shells and fill them with the mixture. Top the squash halves with a gratin (melt 1-2 tablespoons of butter and stir in about 1/2 cup of bread crumbs). Bake for 30 minutes, or until squash shells are tender.

Eating: A good vegetarian main course, especially if you can get your hands on some of those 3-5 pound squashes.

Dish history: This is simply a classic way to use some of your bounty of summer squash. Be sure to saute the stuffing enough that the liquid is cooked out or add enough bread crumbs; otherwise you may end up with a soupy stuffing.

Tuesday, July 26, 2011

Learning the hard way

Despite our attempts to rid our cucumbers of the striped cucumber beetle, the damage was done.

Some of our cucumber plants have been victims of cucumber bacterial wilt. The bacteria that causes this disease overwinters in the stomachs of the striped cucumber beetle, and when they damage your plants the bacteria works its way in. The disease disrupts the plant's ability to move water through its system. It reduces yield, produces misshapen fruit and can spread to other cucurbit crops, such as melon or squash.

This is a good year for us to learn about how important insect control is, since we are not beholden to any members or paying customers for our vegetables. We acted quickly, cutting away diseased vines, pulling hopeless plants and harvesting any cukes that appeared ready. We managed to get a bushel (8 gallons) of cucumbers from the harvest and may get even more if they ripen safely. We pickled half a bushel and saved the rest for cucumber salads.

Recipe with beets

Shredded summer beet salad

Ingredients: beets, basil, lime juice, olive oil, salt

Preparing: Shred beets into bowl with a cheese grater (no need to peel; the skin will end up not grating into the dish). Add chopped fresh basil, fresh lime juice, olive oil and salt to taste.

Eating: Good side dish. Could also substitute the basil/lime juice for cumin/chive/lemon juice or rice vinegar/sesame oil/scallion. We've also added leftover plain black beans to this dish to bulk it up a bit.

Dish history: On hot summer days who in the world wants to roast or boil beets?!?

Recipe with herbs

Herb salad

Ingredients: parsley, basil, cilantro, chicory, chives, arugula, garden cress, baby beet greens, baby radish greens, small kale leaves, shiso leaves (any combination of the above)

Preparing: Wash and chop up all of your greens. Toss with a vinaigrette (we use lemon juice, olive oil, a bit of honey, a smashed garlic clove, salt and pepper).

Eating: Easy side or can be an entire lunch.

Dish history: We have an abundance of herbs and baby greens in the garden. We love the explosion of fresh, diverse flavors.

Sunday, July 24, 2011

Recipe with potatoes

Potatoes and greens

Ingredients: potatoes (tastes even better if they're "new" potatoes), greens (e.g., chard, spinach, beet greens, collards), oil, vinegar, salt

Preparing: Cut the potatoes to even sizes and bake as for oven-browns (we use bacon fat if on hand or vegetable oil, salt and pepper). When the potatoes are crispy and brown, add chopped greens and a splash of vinegar (we use cider), toss well with the potatoes and put back into the oven for about 5 minutes, or until greens are wilted.

Eating: Stir up the dish, being sure to scrape up the crispy browns. This goes well with any meats, but especially grilled ones. It takes care of the starch and vegetable, so it's an easy side.

Dish history: We started eating this in Argentina where there was an abundance of greens, and not so many potato plants planted. It's an especially good way to stretch those tiny new potatoes.

Recipe with cilantro

Cilantro chimichurri

Ingredients: cilantro, fresh hot pepper (e.g., jalapeƱo, serrano, cayenne, habanero), scallions, garlic (optional), vinegar, vegetable oil

Preparing: Finely mince the cilantro, hot pepper, scallions and garlic. Add some vinegar (we use white), but not too much, and some oil, but not too much. The chimichurri should be fresh tasting, not as oily as pesto and not as vinegary as a salad dressing.

Eating: Serve alongside grilled steak or with fish.

Dish history: A chimichurri is a classic accompaniment to grilled steaks in Argentina. Although they usually use parsley and a lot less hot pepper, the cilantro adds a really refreshing taste.

PS: An additional though on fresh cilantro: It is great on top of pasta dishes for a change from the classic fresh parsley or basil.

Recipe with chard

Saag-style chard

Ingredients: chard, clarified butter, garlic, ginger, hot peppers, salt

Note: You need a lot of chard for this recipe: for 2 adults, the uncooked and sliced chard should fill a 5-qt pot. It will cook down a lot.

Preparing: Cook finely sliced chard until it is wilted and you are able to mash it with a potato masher. Clarify your butter (heat butter, let the milk solids fall to the bottom, and cook with the "clarified" butter left on top). Add equal parts finely diced garlic, finely diced ginger, finely diced hot peppers to the clarified butter (the more you add, the more flavorful your chard... to feed 2, use at least 8 cloves of garlic). Add the mashed chard and mix.

Eating: Serve with rice or naan.

Dish history: While in Buenos Aires, we saw a story about a temple in India that serves  lunch to 10,000 people a day (!) and this was the simple recipe they profiled that day. We made it on the farm all the time when we harvested an abundance of chard.

Recipe with green beans

Green beans with ginger

Ingredients: green beans, butter, salt, ginger

Preparing: I think many people overcook green beans. Blanch the beans in boiling water for 3 minutes and then move to an ice water bath to stop the cooking. Melt butter in a saucepan, add matchstick-sized ginger slices, add salt if your butter is unsalted. Once the ginger is cooked to your liking, toss in the green beans to coat with butter and serve.

Eating: Good summer side dish. Can substitute fresh mint for ginger. Because butter is used, it really is best served warm/hot. If you wanted to make this an outdoor party side dish, I'd use a good tasting oil instead of the butter or wait for a hot day.

Dish history: We make this simple dish all the time... even made 20 pounds of it for a friend's wedding we were catering (where we, unfortunately, realized the room temperature butter version is not as appetizing).

Preserving: Freezing vegetables

With our storage room all set up and the freezer running efficiently (estimated $37 worth of annual electricity usage), we are in prime freezing mode right now.


There are many sources on freezing vegetables to refer to; we use Seymour's Self-Sufficient Gardener and The Joy of Cooking. As Seymour writes: "all fruit and vegetables should go to the freezer as soon as they are harvested. To leave them sitting about allows the sugars to start turning into starches and thereby the flavor is lost." So right from our garden harvest, we cold water rinse, blanch, flash cool and pack our vegetables. The JC gives appropriate blanching times for vegetables. Here are the ones we've tried or plan on trying this season:

Beans, green - 2.5 min
Beans, broad in pod - 4 min
Beet greens - 2.5 min
Beets, small - until tender
Broccoli - 3-4.5 min
Brussels sprouts - 3-4.5 min
Cabbage, leaf or shredded - 1.5 min
Carrots, sliced - 3 min
Celery, diced - 3 min
Chard - 2.5 min
Chinese cabbage, shredded - 1.5 min
Collards - 2.5 min
Kale - 2.5 min
Mustard greens - 2.5 min
Parsnips - 2 min
Peas, green - 1.5-2.5 min
Peppers - 2 min
Spinach - 2.5 min
Pumpkin, pureed - until tender
Squash, summer, sliced - 3 min
Squash, winter, pureed - until tender
Turnip greens - 2.5
Turnips, diced - 3 min

Once the vegetables have been blanched, cooled and packed, we use Seymour's tip of sucking out the air using a drinking straw (rather than buying a vacuum sealer). Yesterday, although the hottest day on record in our area, we harvested our collards after we noticed some pest damage and ended up with 40 packed cups worth. We even saved the stems and may try pickling them.

Who doesn't think frozen veggies are far superior to canned?

Saturday, July 23, 2011

Recipe with borage

Borage cocktail

Ingredients: borage leaves, vodka or gin, club soda or tonic (optional), borage flowers

Borage plant
Preparing: Rip up some borage leaves into a cocktail shaker (or muddle them for more flavor). Add the alcohol of your choice and shake.

Drinking: Strain the cocktail straight for a borage-tini and garnish with borage flowers and a thin lemon round. Or mix with club soda or tonic for a refreshing mixed drink.

Drink history: We read in our Seymour book that borage leaves have a "cooling effect" in drinks. With our master-drink-maker friend visiting, we decided to give them a try in our cocktails. If muddled, they produce a very green drink; just shaking in a shaker with ice might still produce the same taste effect, but the drink will be a milder color. The smell and taste are both very cucumber-like. You could also try to use them while making a simple syrup or leave them in alcohol or tea or water to steep for a few days.

Holy tomato

We harvested our first Cherokee purple heirloom tomato. She was growing in a 3-pronged manner, quite strangely. But she sure did taste good with just a few flecks of salt.

Thursday, July 21, 2011

Deposito

Every aspiring self-sufficient household needs to have a lot of space for food storage. As we harvest right now, we are freezing, pickling and canning for the winter months and spring food gap.

And now, thanks to the sharp carpentry skills of our friend (also our parrilla-builder) we have built-in storage shelves in our deposito. We foraged the old stables and wood piles around the property for forgotten wood and managed to build the 9-ft long by 9-ft high, floor-to-ceiling, fully-notched shelves without any home-cheapo-bought pressure-treated 2x4s. It is gorgeous and fits with with the style of the old tack room we've chosen for our food storage space. We fixed a rotting baseboard and animal-proofed it. The saddle shelves are still there and we'll use them to hang onions, garlic and squash. The feed holder is still there and we'll use it to store potatoes, beets and celeriac. And we've added a 15-cu.ft. chest freezer to sit below the window on the open wall. The finishing touches will be to insulate the windows once the winter freezes settle in.

It may take years to get to the point where we're filling the deposito to capacity... what a satisfying time that will be.
Rotten baseboard out

New baseboard in

Building the shelves

Finished shelving

Wednesday, July 20, 2011

Holy oven

With all of the canning and preserving we see in our future, and temperatures in the 90s these peak harvest times, the thought of heating the kitchen up with pots of boiling water is quite unappealing. So we are thanking our lucky stars that a restaurant-grade 6-burner dual oven has landed in our garage.

A friend of ours was clearing out his storage space in Brooklyn the day before he was moving to Texas. We drove down, with our trailer hitched on, to meet him. In addition to some great catering gear, he offered us this amazing oven after the deal he had set up fell through.

So we loaded up the 900-lb beast, strapped her on, and took off down bumpy Atlantic Avenue. Five stops, a broken ratchet, a moving griddle pan, a breaking back leg and 4 hours later, we pulled into Longhaul.

Jason cleaned her spic-n-span and now we need to hook her up to our propane and rearrange the garage. And blanching our veggies and canning our preserves will be so much more pleasant now, especially with temperatures reaching 99 at the end of the week. Our next project: setting up the food storage room.

Saturday, July 16, 2011

Blueberry harvest

With our seven blueberry bushes no more than a foot high and barren, we've harvested blueberries from three different sources recently.

The first was a local farm which sprays their fruit but has a very cheap price per pound. It was a really pleasant experience. The berries are just becoming ripe, so I felt good about my picking, knowing it would spur on the other green ones on the cluster to ripen. The highbush varieties were at least 6 feet tall, and the rows between them were pleasantly wide and grassy. The berries were much smaller than the ones you buy in the grocery store, as expected.

Then we drove south to another local farm that produces organic fruit. At $6 per pound, I was happy I filled up at the cheaper farm. I didn't notice a difference in the berries or their bushes between the organic and non-organic farm. What I did notice is that the organic farm was weedier and not as pleasant to walk through, especially because there was poison ivy EVerywhere. Our friend's almost-2-year-old dumped her bucket of blueberries in the path and her mom started picking them up until I, with my poison-ivy-eye, told her to stand back and stop what she was doing. Oy.

And finally, we hit our dream spot: a wild blueberry grove tucked away behind a beautiful field of grasses and wild flowers in some nearby publicly-owned land. These highbushes were 7-9 feet tall, also in the early stages of ripeness, but gorgeous. The paths between them were overgrown with yarrow and cattails and virginia creeper, the breeze blowing through them ever so gently. There were also wild grapes using the highbush blueberries as natural trellises, green and hard and far from ripe. It was so peaceful to pick in silence with the birds.

So now we have a freezer-ful of blueberries, many pints of blueberry jam and some blueberry cakes and muffins coming soon.

Tuesday, July 12, 2011

Recipe with black currant

Black currant and bacon pizza

Ingredients: pizza dough, sauce, cheese, blackcurrants, bacon, maple syrup, arugula

Preparing: Top your basic pizza with fresh blackcurrants, crispy bacon and arugula (or spinach) and drizzle a bit of maple syrup on it. We used mozzarella, but I bet ricotta or feta would be great, too.

Eating: As is.

Dish history: We had a few handfuls of leftover blackcurrants after having made jams and tarts for the past few days and figured we'd give it a try. The flavors work well together, plus, bacon makes everything better.

Thursday, July 7, 2011

Got cigarette butts?

Something productive has come out of the business of tobacco cultivation: an organic insecticide.

Spraying our cukes
According to our gardening guru, John Seymour, nicotine spray is one of the most powerful organic sprays out there for getting rid of insects. Get a smoker you love to save their butts for you, boil 4 ounces of butts to 1.2 gallons of water, strain and dilute to a 1:2 solution of nicotine:water. Spray this solution on plant foliage and stems (and even fruits since it degrades so quickly, but we're not comfortable doing that yet) and you'll witness the insects dropping like flies... not dead, but knocked out and not wanting to get back onto the plant. The main caution of such an insecticide is that it gets rid of both pests and beneficial insects. Therefore, Seymour recommends using it only if the manual picking-and-crushing-between-your-fingers-method is getting out of control...

... as it was with our curcurbits (cucumber, melon, squash, zucchini). The black and yellow-striped cucumber beetles were shamelessly mating on the leaves, even in some of the blossoms.

Nicotine spray is considered a natural insecticide because it is derived from a plant (others include pyrethrum and neem, for example). Nicotine is found in the nightshade family of plants (solanaceae), predominantly in tobacco, and in lower quantities in tomato, potato, eggplant and pepper. Nicotine-based sprays appear to be in the process of being banned as insecticides in the U.S. (if only it could be banned as a cancer-and-disease-causing stick as well) because of its potential link to bee susceptibility to disease, which has now made me think twice about using it again. Back to the old manual removal method.

Tuesday, July 5, 2011

Preserving: Black currant jam

A big part of our longhaul way of life is to try to eat from the food we grow year-round. This means preserving fruit when it's at its peak so it can be enjoyed throughout the year. Since our fruit garden is in its infancy, we decided that picking local fruit and preserving it is the best and only way to get vitamin C and other antioxidants during the winter and early spring.

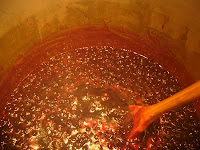
In the Hudson Valley right now black currants are ripe and ready. Some strawberries are, too, and this week we should have blueberries (but our early June cherry crop didn't come this year due to lots of rain and cloudy days). So I went to a local pick-your-own farm and harvested 5 pounds of currants in about an hour. After the first 15 minutes of picking, I remembered that it's hard and tedious work. Each currant bush had dozens of branches with hundreds of berries on them. Not all of them are ripe at the same time, so you have to pick your way through. And since I was planning on making jam right away, I painstakingly made sure there was nothing in that bucket but berries.

We preserved a lot of dulces (jams) and fruit down in Argentina, so I just followed the same method up here:

(1) Wash and sterilize your jars. (Wash jars with warm soapy water, then rinse them in water with a bit of bleach to sterilize them. Then rinse again in clean water. Wash tops with warm soapy water and then sterilize in boiling water. Let jars and tops air dry - don't dry with a towel, etc.)


(2) Use a large pot - big enough so that the fruit and sugar only fill it halfway (the jam rises as you cook it). Add your fruit and sugar in a 5:4 ratio. Since I had 5 pounds of black currants, I added 4 pounds of sugar. (This ratio preserves the jam sufficiently to store jars of it at room temperature for four years.)

(3) Cook the fruit and sugar over high heat, boiling and stirring constantly. You can add a bit of butter to prevent foaming. Cook time can take anywhere from 30 minutes to an hour, depending on the amount you're cooking and the type of fruit. (Black currants are naturally high in pectin, so they take a shorter amount of time. Strawberries, on the other hand, are low in pectin so take longer to reach the right consistency.)

(4) Test for the right consistency by spooning a small amount on a cold, clean plate. Once it cools, tip the plate to see if it runs:  when it runs ever so slightly, cook for 1-2 minutes more.

(5) Pour the hot jam directly into your sterilized jars and close immediately. Be sure to use gloves and keep the jar in a metal pot while pouring in case it shatters.

Saturday, July 2, 2011

Small doses

I am happy to say that I have been poison ivy free for one month now.

I haven't been avoiding it, as I probably should during these summer months when the oils appear to be dripping off of the leaves. In fact, I've taken a fork to many a plant to remove them from our garden area, which involves picking up the leaves and vines with gloved hands and disposing of them.

I would like to attribute my string of good luck to Oral Ivy, a homeopathic product that builds up your body's natural defenses against the toxic oils of poison ivy, oak and sumac. I take 3 drops of the concentrated rhus toxicodendron a day.

Like any homeopathic product, Oral Ivy works in small doses. Such remedies are made by potentizing a substance (serially diluting in water or alcohol, for example, and vigorously shaking it). The substance to be potentized is usually similar to the ailment one is trying to prevent (e.g., potentize poison ivy oil to prevent poison ivy; potentize pollen to prevent pollen allergies), but others are less intuitive. It is a complex science, despite the fact that it is not recognized by strict scientists nor the FDA as a viable "medicine."

I've always believed that small is beautiful (in the economic sense, and also in the social and cultural ones). There is a rhyme and reason to the practice of homeopathic remedies, just as there is one to the concept of peppering in biodynamic farming. In a time and space where bigness, globalism, heavy consumption, needless accumulation and frivolous expansion dominate the collective consciousness, recognizing and participating in the smallness of things is the best remedy I can think of.